The Art of re-stringing a Hoodie: A Comprehensive Guide
We’ve all been there. One minute you’re pulling on your favorite hoodie and the next, tragedy strikes – the drawstring has slipped out of its hood. A sense of despair quickly engulfs you. But fear not, before you throw away that hoodie, we’re here to showcase exactly how to re-string a hoodie.
Hoodies are a staple in almost every wardrobe. They provide comfort and embody a casual style that is both versatile and fashionable. Their importance is undisputed, so why let a simple drawstring snafu ruin your day?
In this article, we aim to equip you with the necessary knowledge to fix this minor mishap.
The Essential Tools for re-stringing a Hoodie
First things first, you need to gather your tools. To properly re-string a hoodie, you’ll need only three things:
1. The hoodie.
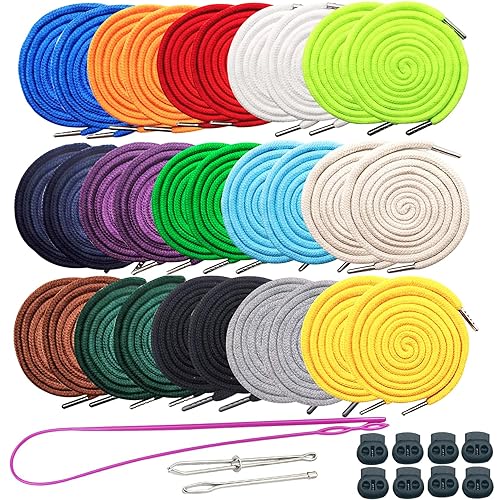
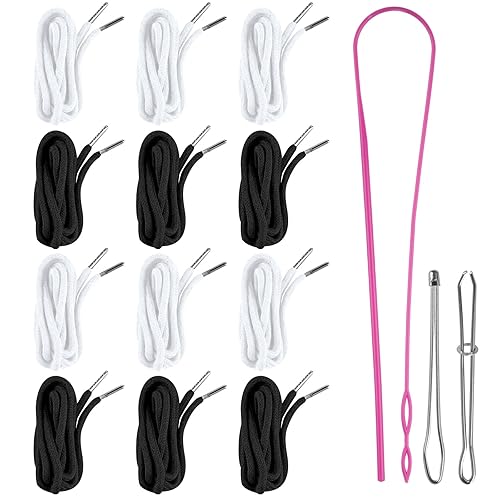
2. The Drawstring.
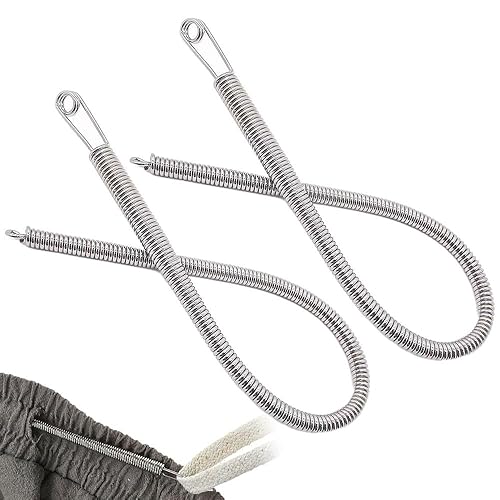
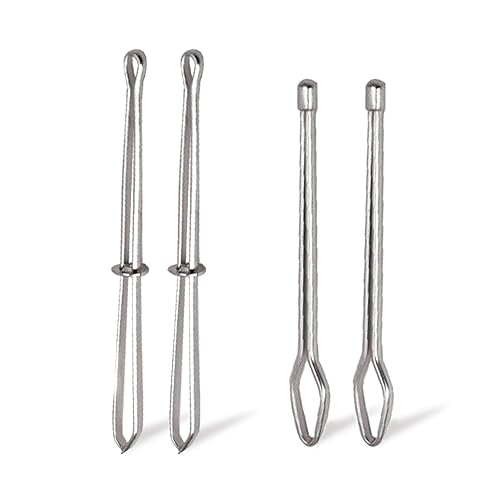
3. A safety pin or bodkin.
The safety pin or bodkin will act as a guide, helping you navigate the drawstring through the hood. Now that you have your tools ready, let’s dive into the steps on how to re-string a hoodie.
Simple Steps on How to re-string a Hoodie
Step 1: Attach the Drawstring to the Safety Pin
The first step in re-stringing a hoodie involves attaching one end of the drawstring to the safety pin or bodkin. This tool will help guide the string through the fabric tunnel of the hood without getting lost halfway.
Step 2: Insert the Safety Pin into the Hood
Next, you’d want to insert the safety pin (with the drawstring attached) into one end of the hood’s tunnel. Push the pin and drawstring along the fabric tunnel, ensuring that the drawstring doesn’t get twisted within.
Step 3: Thread the Drawstring
Keep pushing the safety pin along the length of the hood until it comes out at the other end. Gently pull the string until both ends are of equal length.
Step 4: Secure the Drawstring
Finally, secure the drawstring by knotting both ends. This prevents the string from slipping back into the fabric tunnel.
Tips and Tricks to re-string a Hoodie Easily
While the steps above may sound straightforward, it can be quite challenging, especially if it’s your first time. Therefore, here are a few tips to make the process easier:
• Choose a larger safety pin as it’s easier to grip, making it easier to push along the fabric.
• If the drawstring keeps twisting inside the tunnel, straighten it out before threading further.
• Tie a knot at each end of the drawstring after re-stringing to prevent future slip-outs.
re-string a Hoodie: An Essential Skill for the Fashion-Conscious
Knowing how to re-string a hoodie is an essential skill for anyone keen on maintaining their wardrobe. It breathes new life into your favorite hoodies, saving you both time and money.
At the end of the day, learning how to effectively re-string a hoodie is not merely about preserving its functionality but also about accentuating your personal style. So, the next time your drawstring slips out, don’t rush to replace your hoodie. Instead, embrace it as an opportunity to demonstrate your fashion savvy skills.
Remember, in the realm of fashion, even the smallest details matter. Something as minor as a functional drawstring can make or break the overall look and feel of your outfit. And with these guidelines, consider yourself a certified hoodie re-stringing pro!
In closing, we’ve unwrapped the mystery of how to re-string a hoodie, transforming what could have been an arduous task into a simple, manageable process. Step forth confidently, knowing that no drawstring malfunction stands between you and your beloved hoodie.
How can you rethread a hoodie without using a safety pin?
Rethreading a hoodie without a safety pin is not as daunting as it might sound. All you need is some patience and a few household objects like a straw or a wire hanger.
Begin by removing the drawstring entirely from your hoodie. Take care to avoid any tears in the fabric. You then need a tool through which you can feed the string back inside the hood or waistband.
One such tool could be a plastic drinking straw. Insert one end of the drawstring into the straw, then bend the other end of the straw and insert it into the hole of the hoodie. Push it all the way through until it comes out of the other end.
Alternatively, you can use a wire hanger. Straighten out the wire hanger while leaving one end hooked, thread the drawstring through the hook, and use the straightened wire to guide the drawstring through the hoodie, entering and exiting at the correct holes.
With either method, once the drawstring is partially threaded, pull it through evenly so that equal lengths extend from both sides of the hoodie.
And there you go, your hoodie is successfully rethreaded without using a safety pin! Remember, all these steps require patience and gentle handling to ensure you don’t damage your hoodie’s material in the process.
How can you knot a slack hoodie cord?
Tightening a loose hoodie cord can be a bit tricky, but it’s definitely doable! Here is a simple method to knot a slack hoodie cord:
Step 1 – Hold the Cord: Start by straightening your hoodie on a smooth surface. Hold the loose cord firmly at the point where you’d like the knot to be.
Step 2 – Make a Loop: Twist the part of the cord you’re holding to create a loop. The loop should be large enough for the other end of the cord to pass through it later.
Step 3 – Pass the Cord Through: Pass the free end of the cord through this loop. This will start forming the knot.
Step 4 – Tighten the Knot: Hold the free end of the cord and pull it while holding the loop in place. This will tighten the knot. Be sure not to pull too hard as this might cause the knot to lock too tight and become difficult to loosen later.
Remember, practice makes perfect. And there you have it, a quick and easy way to knot a slack hoodie cord for a tighter, secure fit!
How can you rethread a hoodie using a hanger?
Rethreading a hoodie drawstring can be a quite challenging task, but using a hanger can make the process much easier. Here’s a step-by-step guide on how you can rethread a hoodie using a hanger.
Step 1: Straighten out a wire hanger with a pair of pliers. Keep the hook intact as it will be useful in fishing the drawstring through the hood.
Step 2: Attach one end of the drawstring to the hook of the wire hanger. You can do this by tying it securely or taping it.
Step 3: Start feeding the hanger (with the attached drawstring) into the drawstring hole at one end of the hoodie. Be careful not to let the other end of the drawstring slip into the channel.
Step 4: Gently push the hanger and drawstring through the hoodie’s channel. Keep feeding it until the hanger comes out the other side of the hoodie.
Step 5: Once the hanger is through, carefully untie or un-tape the drawstring from the hanger.
Step 6: Pull both ends of the drawstring until they’re even. Enjoy your rethreaded hoodie!
Using a hanger is an efficient method to rethread a hoodie without causing any damage. It may take a bit of patience, but the result is worth the hassle. Carry these steps out carefully to ensure a successful rethreading process.
How can you reinsert a drawstring into your hoodie?
Reinserting a drawstring into your hoodie can seem like a daunting task, but by following these simple steps, you will get it done in no time:
1. Find a Safety Pin or Wire Hanger: The first thing you need would be something long and thin to help guide the drawstring through the hood. A safety pin is usually the best choice as you can attach it to one end of the drawstring and use it as a guide.
2. Attach the Drawstring to the Safety Pin: Securely fasten one end of the drawstring to the safety pin. Make sure it’s tight so it won’t come off inside the hood.
3. Insert the Safety Pin into the Hoodie’s Hole: Here is where the real action begins. Insert the safety pin into the hole of the hoodie where the drawstring should enter.
4. Thread the Drawstring Through: Use the safety pin as a guide, slowly push and slide it through the channel of the hoodie. Keep going until the safety pin comes out of the other end.
5. Remove the Safety Pin and Adjust the Drawstring: Once the safety pin comes out of the other end, remove it from the drawstring. Then, pull on both ends of the drawstring until they are of equal length.
And you’re done! Now you know how to reinsert a drawstring into your hoodie. It could be a bit tricky at first, but with a little patience, you’ll get the hang of it.
“What are the steps to re-string a hoodie effectively?”
Re-stringing a hoodie might seem like a daunting task, but if you follow these steps, it’ll be done in no time:
Step 1: Gather your materials. You’re going to need your hoodie, a safety pin, and your replacement string.
Step 2: Attach the safety pin. Connect one end of the string to the safety pin. This will help guide the string through the hoodie’s tunnel.
Step 3: Thread the string. Point the safety pin into the hole at one end of the hoodie’s tunnel and start pushing it through. Keep going, scrunching up the fabric along the pin, then pulling it down along the string.
Step 4: Keep threading until reaches the other end. Continue pushing the safety pin and string through the tunnel until it comes out the other end. Make sure not to let the other end of the string to get lost inside the tunnel.
Step 5: Remove the safety pin. Once you have both ends of the string hanging outside of the hoodie, remove the safety pin.
Step 6: Adjust the string. Pull on both ends of the string until they are even. At this point, you can either let them hang loose, or you can tie them in a knot to prevent them from slipping back into the hoodie.
This is a simple but effective process, so don’t let a missing drawstring deter you from wearing your favorite hoodie. Breathe new life into your old hoodie by re-stringing it yourself.
“What tools do you need in order to re-string a hoodie properly?”
To re-string a hoodie properly, you will need the following tools:
– A replacement string: Ensure it’s durable and the right length for your hoodie. Most standard hoodies require a string that is about 60 inches long.
– A safety pin or bodkin: This is used to thread the string through the hoodie’s eyelets. A safety pin is easily accessible, but a bodkin may make the task easier as it’s a tool specifically designed for threading cords through loops.
– A pair of scissors: Used to cut the new drawstring to the appropriate length, if necessary.
Here’s a step-by-step guide on how to re-string a hoodie:
1. Attach the safety pin or bodkin to one end of the drawstring. This will make it easier to navigate the cord through the hoodie’s eyelets.
2. Insert the safety pin or bodkin into one eyelet in the hoodie and work it through to the other side, pulling the drawstring along with it. Be careful not to let the other end of the drawstring slip into the hoodie along the way.
3. Once you’ve threaded the safety pin or bodkin through to the other side, remove it from the drawstring.
4. Even out the ends of the drawstring so that they hang to an equal length from the hoodie’s eyelets.
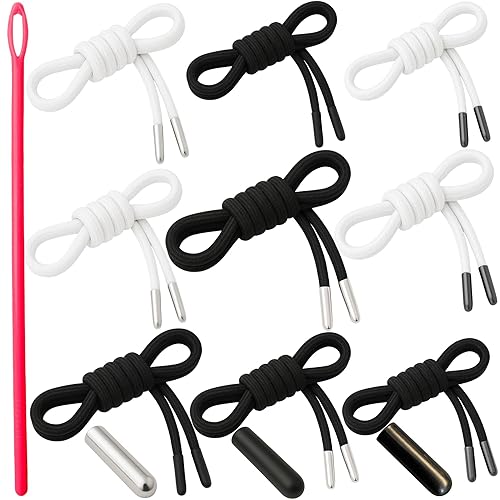
5. If necessary, cut any excess string with the scissors and secure the ends to prevent fraying. Some people prefer to knot the ends of the drawstring, while others may use something like a plastic aglet (the small plastic or metal sheath found on the end of shoelaces).
Take note, patience is key when re-stringing a hoodie. It doesn’t have to be a frustrating process if you take your time and do it correctly.
“Are there any tips and tricks for making the process of re-stringing a hoodie easier?”
Re-stringing a hoodie can often seem like a daunting task but fear not, it is far simpler than it appears. Here are some handy tips and tricks to make the process easier:
1. Use a safety pin: Attach a safety pin to one end of the string. This makes it easier for you to guide the string through the hood. The weight and shape of the safety pin helps to push the string through.
2. Straw method: Another useful method is using a straw. Thread the string through the straw, bending and taping the end to the straw. Push the straw through the hood’s tunnel, and once it’s through, remove the tape and straw.
3. Tweezers or a hanger can help: If you’re stuck at any point, tweezers can be used to grip the string and pull it through. A straightened wire hanger can double as an alternative to the straw and safety pin methods.
4. Keep the ends even: Once you’ve threaded the string back through, ensure both ends are even. This will give your hoodie a balanced look.
Remember, patience is key when re-stringing a hoodie. It may take a little time, but if you follow these tips, it will be done quicker than you think!
In conclusion, re-stringing a hoodie is a straightforward process that anyone can do at home. From using a safety pin, a re-threading tool to a straw or a chopstick, you can easily fix your hoodie drawstring in just a matter of minutes. This can save your favorite hoodie from becoming obsolete while also saving you a few bucks. So, the next time you find yourself with a hoodie that’s missing its drawstring, don’t fret. Just retrieve your string, follow these simple steps and your hoodie will be as good as new again. Your hoodies go through wear and tear over time, but remember, a little care goes a long way!


